The current MSO software contains four function enhancements: The legal requirements of the European General Data Protection Regulation (GDPR) are integrated in version 4.0.4. The following series of pictures illustrates how to create declarations of consent for the use of MSO applications and how personal data can be (automatically) deleted or anonymized. In addition, the newly integrated escalation function shows how the timely processing of individual topics, tasks or ations can always be tracked. Previously, field contents could be displayed within the MSO event templates in the form of predefined matrices. With the new version, the MSO software offers the possibility to fix a desired number of rows and columns within this representation, which noticeably increases the flexibility when mapping individual project landscapes.
The General Data Protection Regulation (GDPR) is an ordinance that entered into force on May 25 2018. It contains provisions on the protection of individuals with regard to the processing of personal data and on the free movement of such data. In the course of this, the MSO Maestro offers, in addition to anonymizing deleted user data, the possibility of creating a declaration of consent for the use of the application.
The respective settings menu is located in the administration area of the application:
1.1 Data protection (declaration of consent)
The menu item “Privacy” is divided into two sections.
Section 1 provides central function settings that can be enabled or disabled:
Anonymize user after removal If the function is activated, the data can be anonymized if required when a user account is deleted.
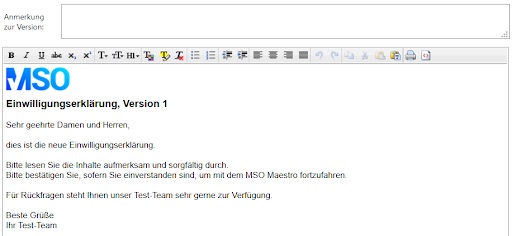
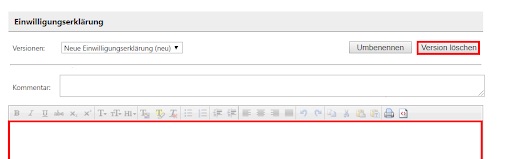
Use declaration of consent Activates the created declaration. Section 2 offers the possibility to create a declaration of consent using the RichText Editor.
In addition, new versions can be created, deleted or commented on:
Versions All saved versions of the declaration of consent are stored here. By clicking on the selection menu, you can view previous versions.
Rename Use this function to rename the title of the declaration of consent.
New version If you select this function, you can create a new version.
Note on the version Comments or other notes can be stored here.
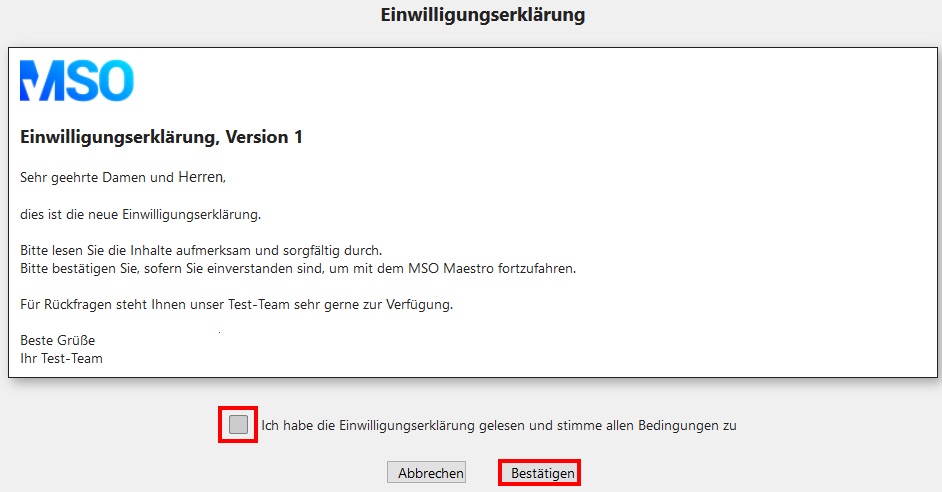
If the use of the declaration of consent is activated, the users will receive it as of the next login attempt:
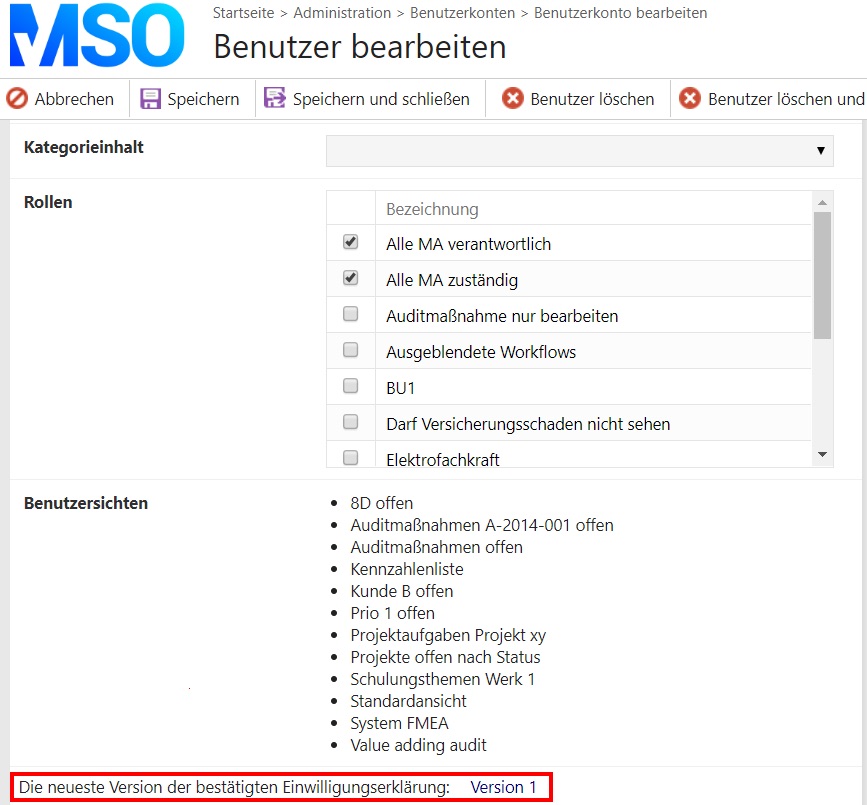
From now on, users can only continue processing in the MSO Maestro after they have given their consent. In addition, the consent is stored as corresponding information in the user account:
1.2 Use Case: Creating a new declaration of consent
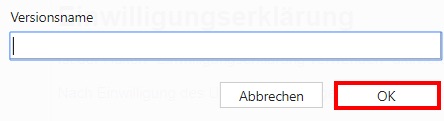
In order to create a new version, please click on the “New Version” button:
A pop-up window then opens. Now enter the new version name and confirm with “OK”:
After you have created your new version, a new, empty editor is now available to you. Now edit your version according to your wishes. If you do not want to adopt the version, you can remove it again. To do this, click on the “Delete version” button:
Note: A version can only be deleted until it is saved for the first time.
When you are satisfied with the editing, please finish the process with “Save and close”.
1.3 Anonymizing users
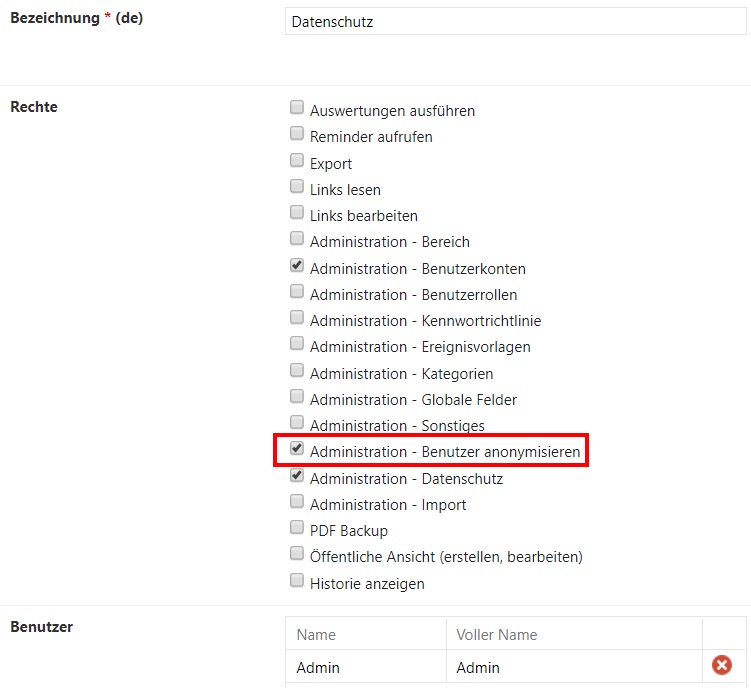
In order to anonymize the data of deleted user accounts, the function itself must be activated (see section 1.1., Data Protection) on the one hand, and users require the corresponding right on the other. This is assigned via the user roles:
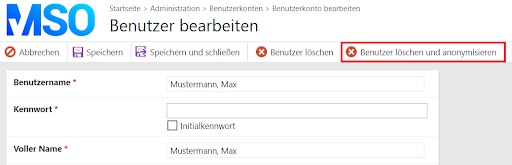
User data should be anonymized directly with the deletion process: If a user has been granted the corresponding right, he can optionally delete the data when deleting a user account and anonymize it directly:
Afterwards the user is displayed as “Anonymized” and numbered consecutively.
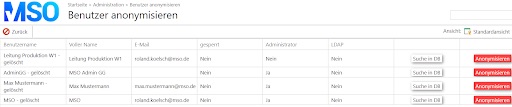
User data should only be anonymized as required: If a user account is to be deleted first and anonymized only when required, the entries can be made subsequently in the administration area. If a user has received the corresponding right, the menu item “Anonymize user” is displayed in the administration area.
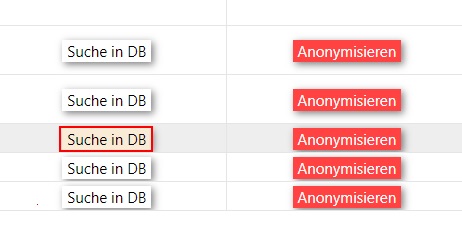
To make the desired adjustments, select the menu item. The editing page then opens. The deleted users are listed there:
Search in DB
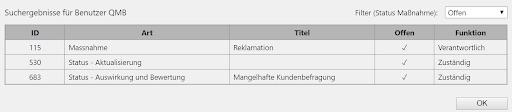
If you select this function, the system automatically lists all tasks to which the deleted user is still assigned. You can use a filter menu to differentiate between the statuses:
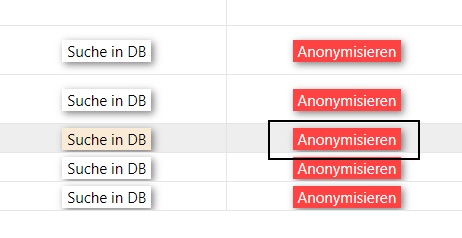
Anonymizing After you have checked or corrected the responsibilities, the user account should be made anonymous. To do this, click on the selection box and then confirm the deletion process:
Afterwards the user is displayed as “Anonymized” and numbered consecutively.
2. Escalation function
With the MSO Maestro, the timely processing of topics can always be tracked, i.e. which topic is in which processing status, with whom and with which date. Nevertheless, it may happen that target deadlines are not met when a topic is being dealt with. Depending on the priority, an escalation function can be a necessary means here.
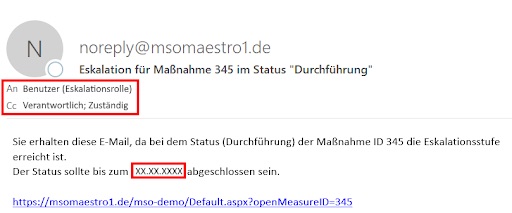
With the current version, you now have the option of using such a function. This can be activated or deactivated individually for each event template in the administration area of your application. Depending on the constellation, a responsible person can be directly preset or optionally selected in the editing mask. If a target date is exceeded, the system sends an e-mail to the person responsible and the person in charge of the task. After a specified time x (in days), both receive an e-mail again, but this time the “Escalation Person” also receives the message. From this point on, the e-mail is repeated at intervals of x days to all three persons until the affected status step is completed or the action is completed.
Display of the automatic e-mail notification:
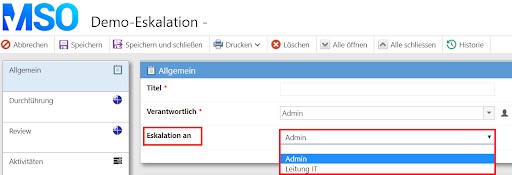
The entries are made in the general part of the editing mask in a field “Escalation to”:
Note: The editability of the field can be restricted via the rights settings of the respective event template.
2.1 Defining the group of persons
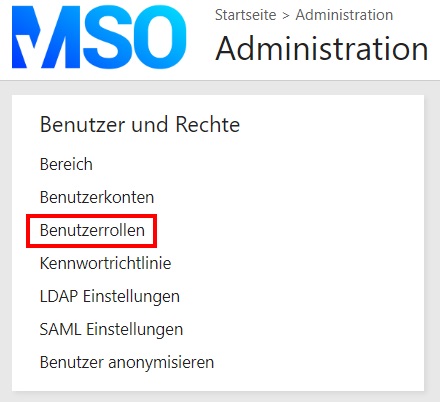
In order to define the group of people being considered for an escalation, the users must be assigned to a role. For this purpose, it is advisable to create a corresponding user role “Escalation”. Open the administration area and select the menu item “User Roles” under “Users and Rights”:
Now create a new role and add a label:
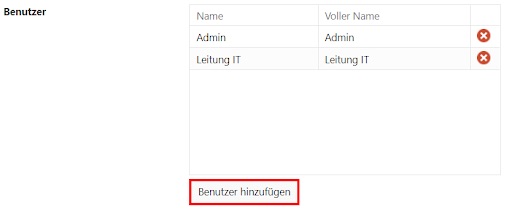
Now click on “Add user” and define the intended group of people:
After you have made the desired settings, end the process with “Save and close”.
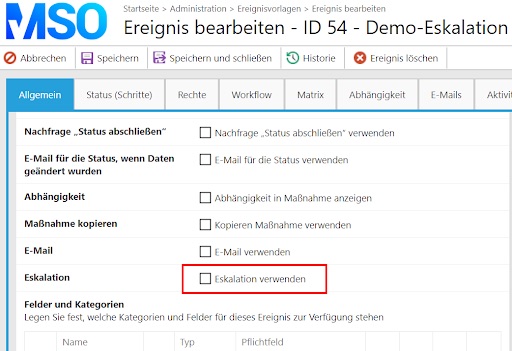
2.2 Activating the escalation function
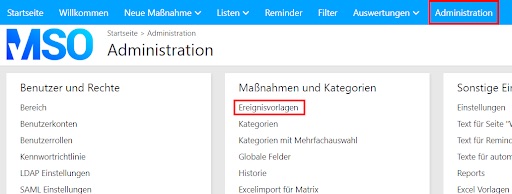
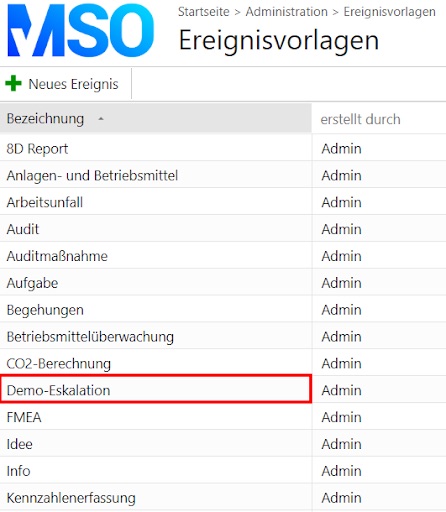
To use the escalation function, please select the menu item “Event templates” within your administration area:
Then select and open the desired event template to revise the workflow settings:
Scroll down in the “General” section until the “Use Escalation” function appears:
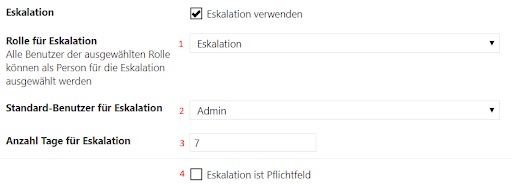
After you have checked the box, various setting options open up:
Role for escalation Select a suitable role here, in the example: User role “Escalation”.
Standard user for escalation If required, specify a user for the selected role who is to be the default user. This user is automatically preset when new tasks are created, but can be replaced by another user of the role.
Number of days for escalation Here you can define the time period from when an escalation mail is to be sent if a target date is exceeded. This period also describes the cycle in which the e-mail is sent again to the persons involved.
Escalation is mandatory field Optionally determine whether the field must be filled.
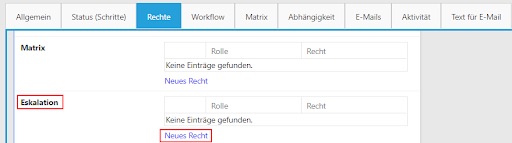
To specify who may edit the field “Escalation to” within the tasks, please open the rights settings of the event template and scroll to “Escalation”:
The editability of the field can now be restricted if required by assigning new rights. Please note the logic of the rights system.
After you have made the desired settings, end the process with “Save and close”. From now on the escalation function can be used.
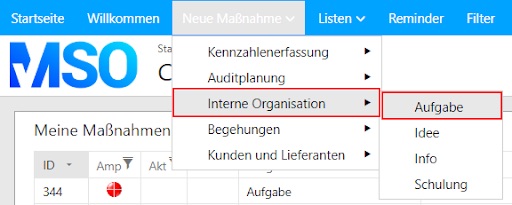
3. Display of event templates in submenus
Since many topics can be replaced by workflows and controlled centrally with the help of MSO Maestro, MSO now offers the option of subdividing event templates into submenus. The event templates can thus be merged under a desired menu term:
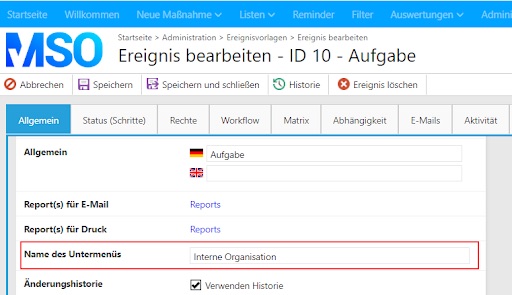
To make the settings, please open the administration area and select the desired event template. Scroll down in the general part until the field “Name of submenu” appears:
Name the desired menu item here, e.g. “Internal organization”, and end the process with “Save and close”. From now on, the event template will be listed in the “New action” tab under the selected term.
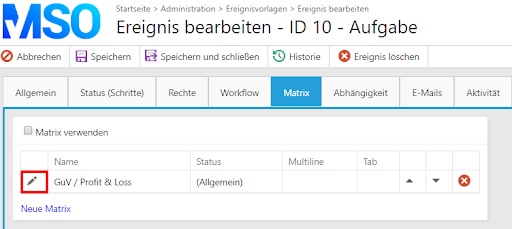
4. Fixing rows and columns of a matrix
Within the MSO event templates, field contents can optionally be displayed in the form of matrices. The MSO Maestro now offers the possibility to fix a desired number of rows and columns within this display.
To make the desired adjustments, please open the corresponding event template in the administration area and select the menu item “Matrix”. Now all existing matrices are displayed, which can be optionally revised, deleted or newly created. To edit an existing matrix, first click on the pencil icon:
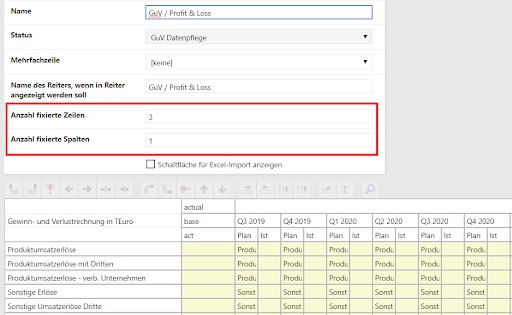
Now the edit mask of the selected matrix opens. The two fields “Number of fixed rows” and “Number of fixed columns” are now listed in the settings menu:
Now specify the desired number of rows or columns to be fixed and end the process by saving and closing.
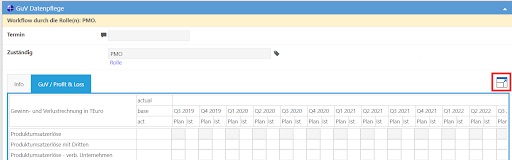
You now have the option of enlarging the display window of the matrix within a task. To do this, click on the box on the right-hand side of the matrix:
Then the representation of the action is maximized and displayed over the entire page:
You can now scroll vertically or horizontally as you wish, the previously defined number of fixed rows (from above) or columns (from left) remains unchanged and thus always in view. To minimize the display again, please click again on the box at the edge of the matrix:
The original display of the action is then displayed again:
Want to find out more? Contact us now!
We will be happy to advise you without obligation.
If you would like to be informed about current developments, features and other news about MSO in the future, simply register using the following form.